Are you wondering how to update PHP version in your WordPress website/blog or why you should do it? If your website is running an older version of PHP, WordPress will give you a warning.
Why would you get a warning? An older version of PHP will make your site run slower. Slower PHP versions are also prone to spams and hacking.
To avoid all these issues, you will need to make sure that your site using the most recent version of PHP.
In this article, we are going to show you how you can successfully update the PHP version your website is running if you are using Hostgator.
Before updating your PHP versions, there are chances that your site may not work well after the update. Matter of fact, your site may not work at all. The new PHP codes may not be compatible with the current theme or plugins that you are using.

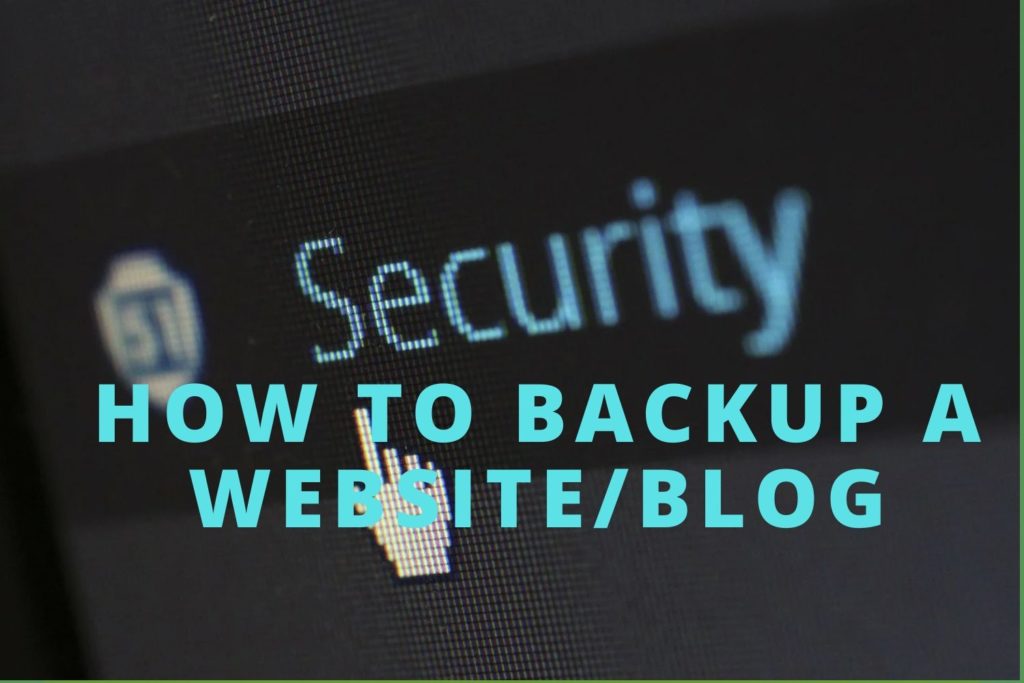
For these reasons, it is recommended that you back up your site before you update the PHP version your site is running.
Before learning how to update PHP version in WordPress, there is something else you need to take care of. learn how you can backup your website/blog. You need to consider backing up your site before continuing to update the PHP version for safety purposes.
I am not saying that your site is going to crash. However, I want you to be safe on every step you take in this process. I don’t want you to lose any of your data or posts that you spend a lot of time putting together.
Now I am assuming that you have backed up your site and ready to go to the next step.
Follow the following steps to update your site
The first thing to do is to log into your Cpanel from your hosting company. In this example, we are using HostGator. If you are using other sites like GoDaddy, etc, you will probably follow the same steps or a variation of these steps.
- Login into your Hostgator account. By going to: https://www.hostgator.com/
This link will take you where you can login.
- Click on the sign-in link found on the right top corner of the page and then click of Portal (head to the customer portal). This will take you to a sign-in page.

- Type your email address in the provided space. Then click Next.
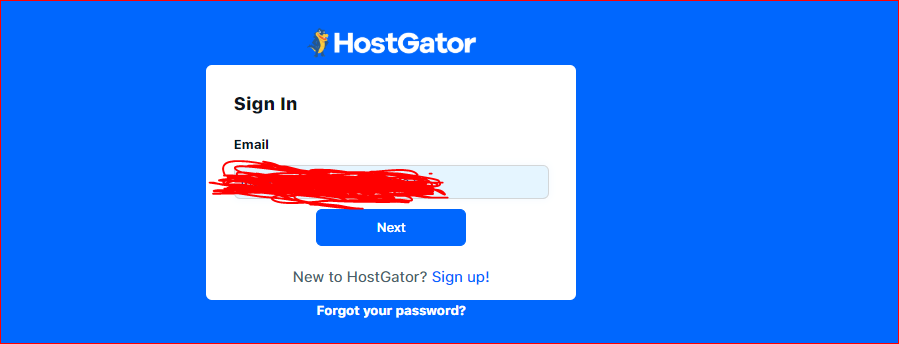
- Enter your password and then click login. This will take you to your HostGator account.

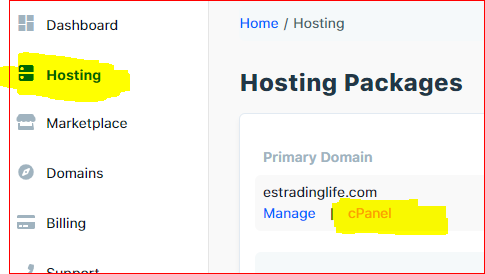
- Click on Hosting and then click on the cPanel link that will appear under your domain. This will launch your cPanel and it will be opened in a new tab. On this new page, scroll down until you reach SOFTWARE.
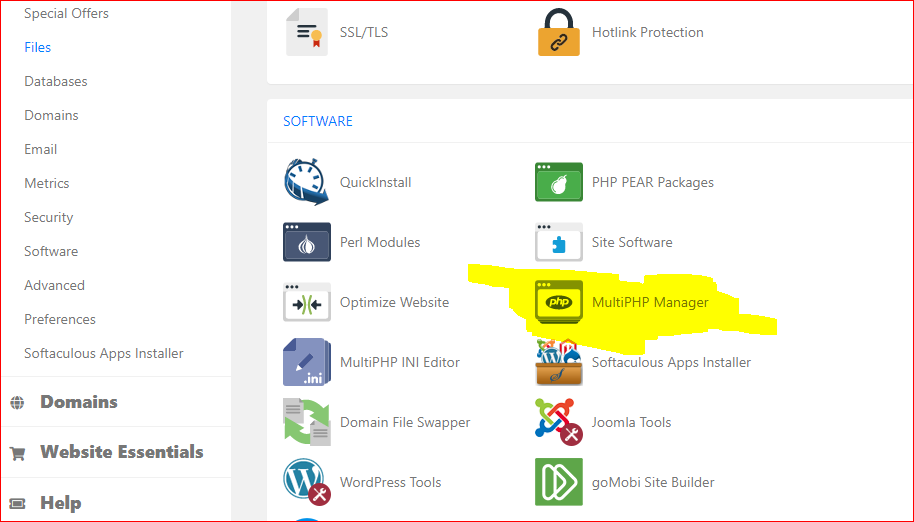
- Click on MultiPHP Manager found under SOFTWARE.
At this point, you are almost done. The only thing left is selecting your domain and updating it to the most current version.
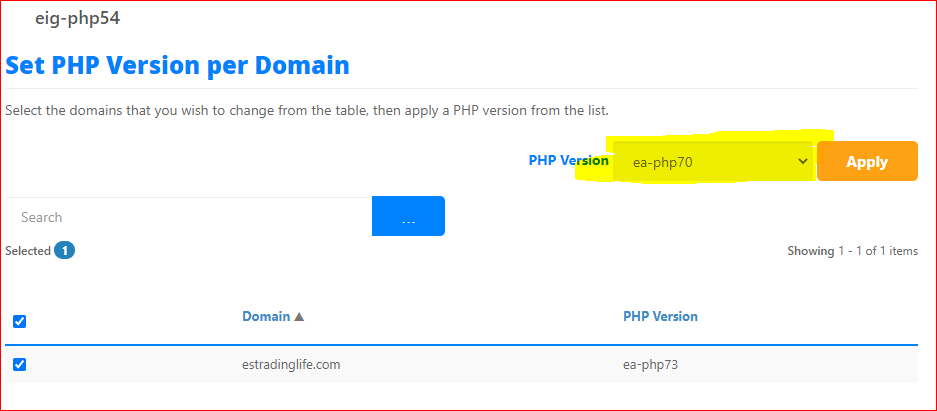
- Check a box in front of a domain name at which you want to update PHP. You will do this by clicking on a box or boxes in front of your domain name(s). This will enable the PHP version section where you can select the PHP version you desire.
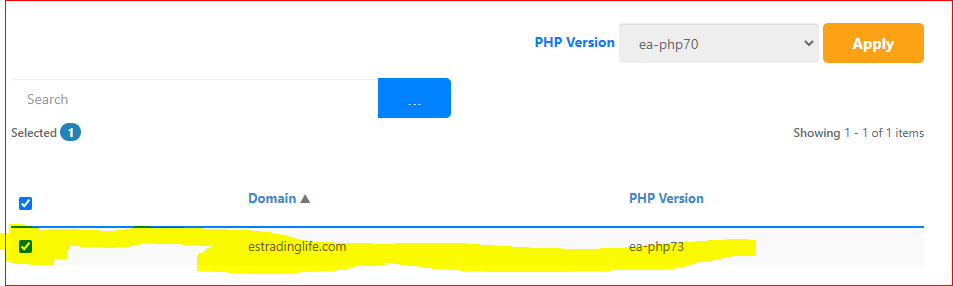
- Click on a drop-down menu find in front of PHP Version and then select the version you want.
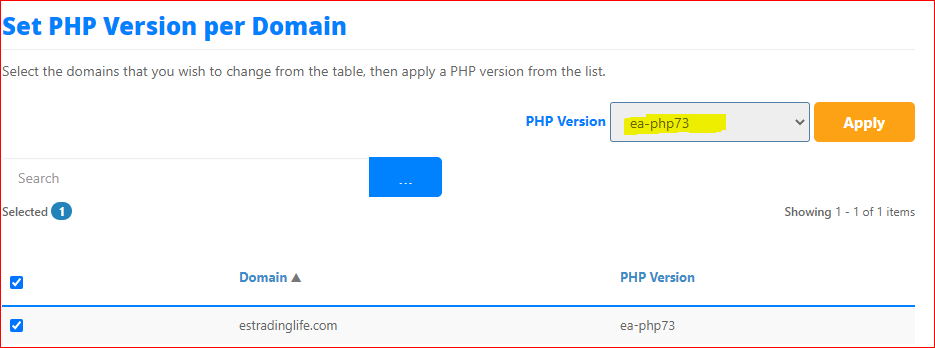
- After selecting the PHP version you want, click on Apply. This will update your site to the PHP version you selected.
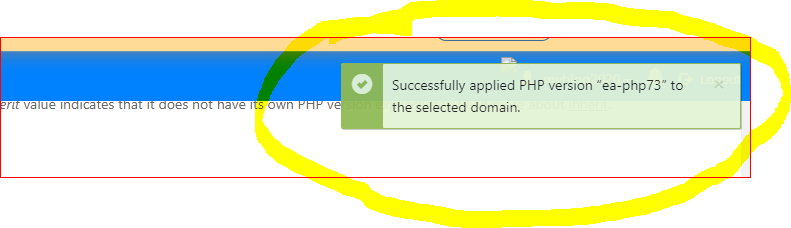
After clicking apply, you will see a message on your screen telling you that the new PHP version you selected has been successfully applied to the domain you selected.
And Voila ! You are done !